By his two adoring Aunties, Rachel & Miranda It's been a few days since we have posted anything, and while I feel guilty, I think we have a pretty good excuse - a lot has been happening - as you can see from the precious picture below.
Our growing family just returned home from our annual Christmas festivities, where we spent most of our time playing with the 6 kiddies (who are all under the age of 4), preparing/eating/cleaning up after 3 plus meals a day, and enjoying the winter wonderland that is the Adirondacks. It was GREAT fun, except for the fact that we were minus 3 people, due to Emily's fast approaching due date with baby numero dos!
Shortly after we arrived back to our respective states and houses we found out that Emily's water broke and shortly after she delivered a beautiful, healthy baby boy - literally, she pushed for all of 9 minutes!
Emily and her husband named the precious little guy Levi Noel (pronounced like "nole," after our grandpa on our mom's side), who measured in at 8 lbs 8 oz and 21 inches, was welcomed into the world at 1:24pm.
And I think this should satisfy all of our appetites for the night :)
Love to Em, Matt, Van and Baby Levi from Auntie Mandy and Auntie Rae
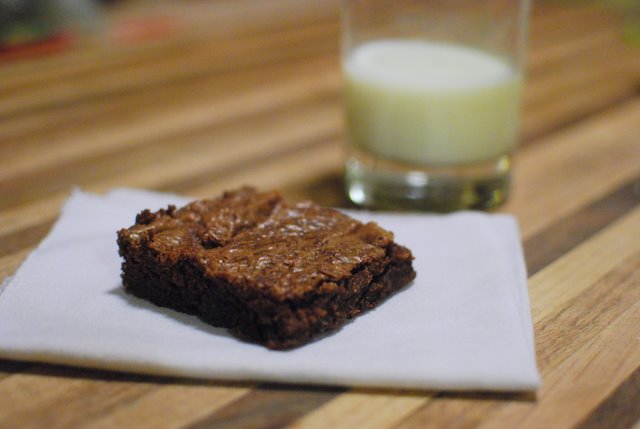
By Miranda I actually really like box brownies but I prefer to do things from scratch. This recipe is pretty close to a fudgy thin and chewy box brownie mix. It's from an old Betty Crocker cookbook.
You will need:
12 oz semisweet chips or chocolate of your choice (2 cups chopped)
1 stick butter (1/2 cup)
1 cup sugar
1 1/4 cups flour
1 tsp vanilla
1/2 tsp baking powder
Scant 1/2 tsp salt (less if butter is salted)
3 eggs, beaten
1 cup chopped nuts, optional
Preheat oven to 350F. Melt chocolate and butter over low heat, stirring frequently, until smooth. Remove from heat. Stir in remaining ingredients. Spread in greased 13x9 inch pan and bake 25-30 minutes or until middle is just set. Do not overbake. Cool completely before cutting.
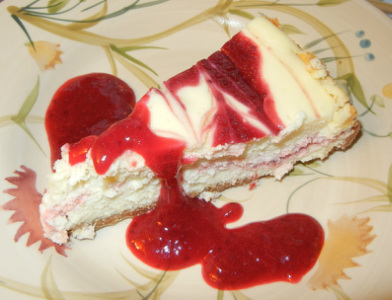
By Rachel I made this for Christmas at my in-laws this year and it was a big hit! I have heard multiple times that making cheesecake is really difficult, but this recipe from the Joy of Baking website was not hard, did not take that long and tasted FABULOUS! Try it, I dare you! Serves about 12-14 people
You will need:
For the Cranberry Swirls (and sauce for serving):
1 - 12 ounce bag of fresh or frozen cranberries
1/2 cup sugar
2 cups water
zest of one lemon or orange
For the Crust:
2 cups of graham crackers, finely crushed (I used blender to crush them)
2 Tbs sugar
1/2 cup unsalted butter, melted
For the Cheesecake Filling:
3 - 8 ounces packages of cream cheese at room temperature
1 cup sugar
1 Tbs flour
4 eggs, room temperature
1 Tbs heavy cream
1 tsp vanilla
To make:
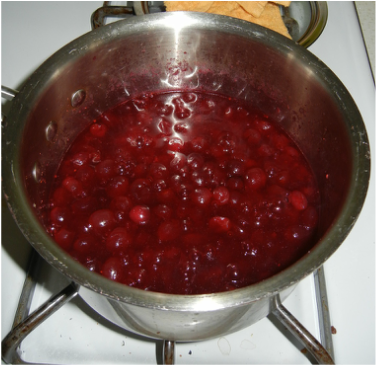
First make your cranberry sauce, you will use this for the swirls and the sauce to serve the cake with. In a medium sized saucepan, place cranberries, sugar, and water. Then, over medium-high heat, cook the ingredients until boiling, stirring to dissolve the sugar. Reduce the heat to medium low and gently boil the filling, stirring often to prevent the filling from burning, until it becomes thick and syrupy and reduced to about 2 cups. This takes about 20-30 minutes. Remove from heat, stir in the zest, and let cool completely before using. (I am not a fan of chunks in my cheesecake so I put this sauce into the blender after it cooled a bit and pureed it until it was smooth and delicious - I highly recommend doing this to get rid of any cranberry chunks). Set the sauce in the fridge while you work on everything else.
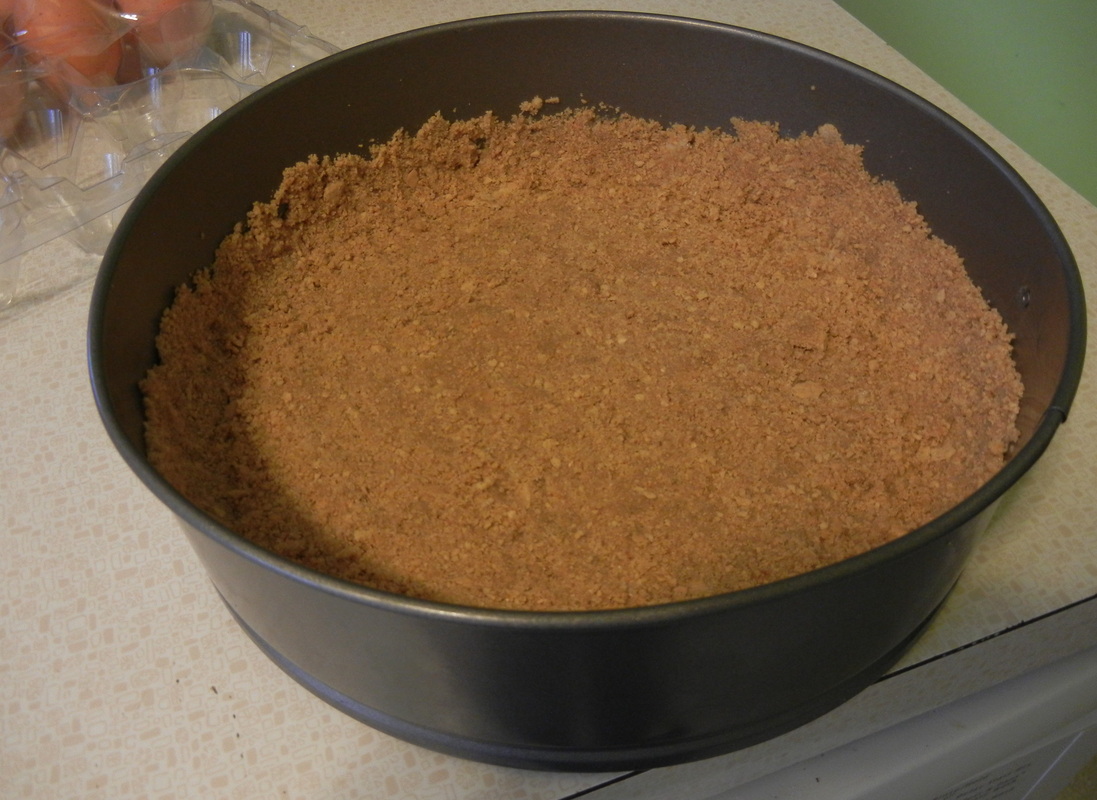
Now for the crust...grease a 9 inch round spring form pan and line the bottom with parchment (you don't HAVE to do this but it makes for easier clean up and serving!) Preheat oven to 350 degrees F and place the oven rack in the center of the oven.
In a medium sized bowl combine the graham cracker crumbs, sugar, and melted butter. Press the crumbs evenly over the bottom and about 1 inch up the sides of the springform pan. Cover and refrigerate while you make the filling.
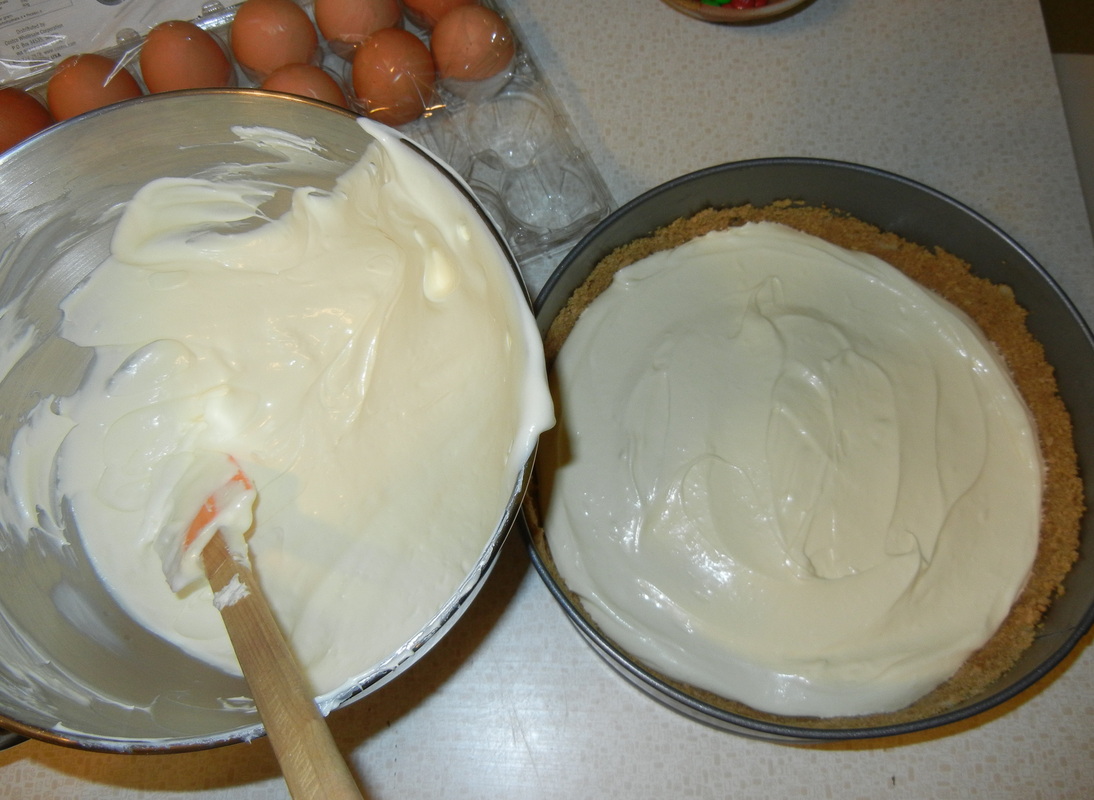
Now for the money maker...in the bowl of your electric mixer, beat the cream cheese, sugar, and flour. Beat on medium speed until smooth (about 2 minutes), scraping down the bowl as needed. Add the eggs, one at a time, beating well (about 30 seconds) after each addition. Scrape down the sides of the bowl. Add the cream and vanilla extract and beat until incorporated.
Remove the crust from the refrigerator and pour half the cheesecake filling into the pan.
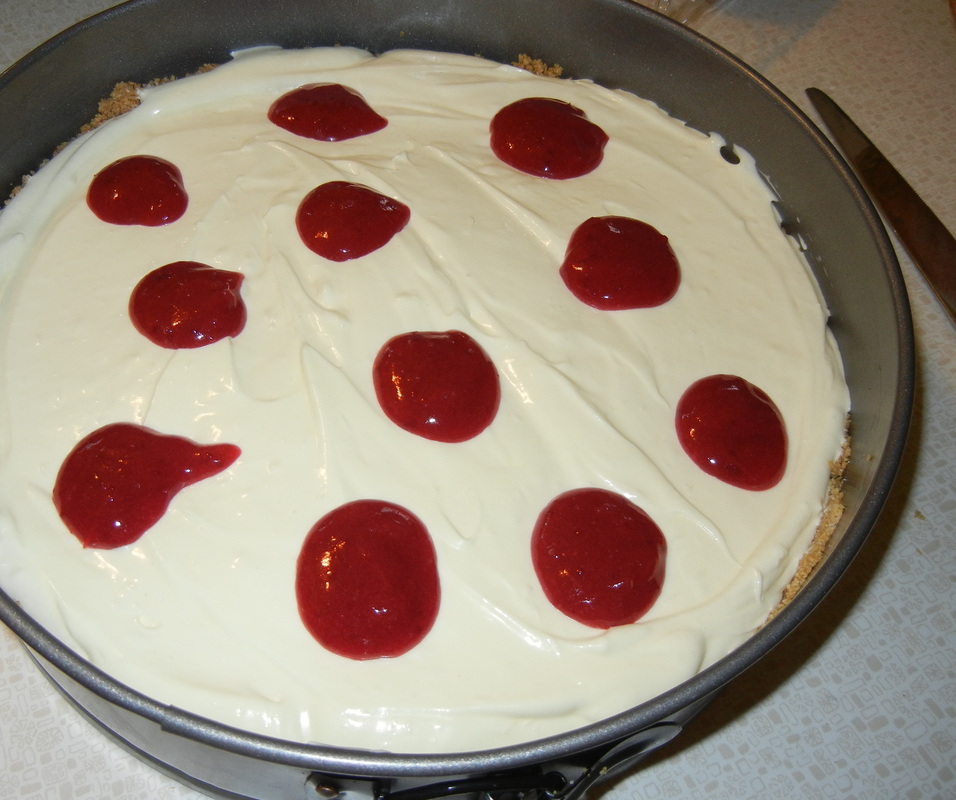
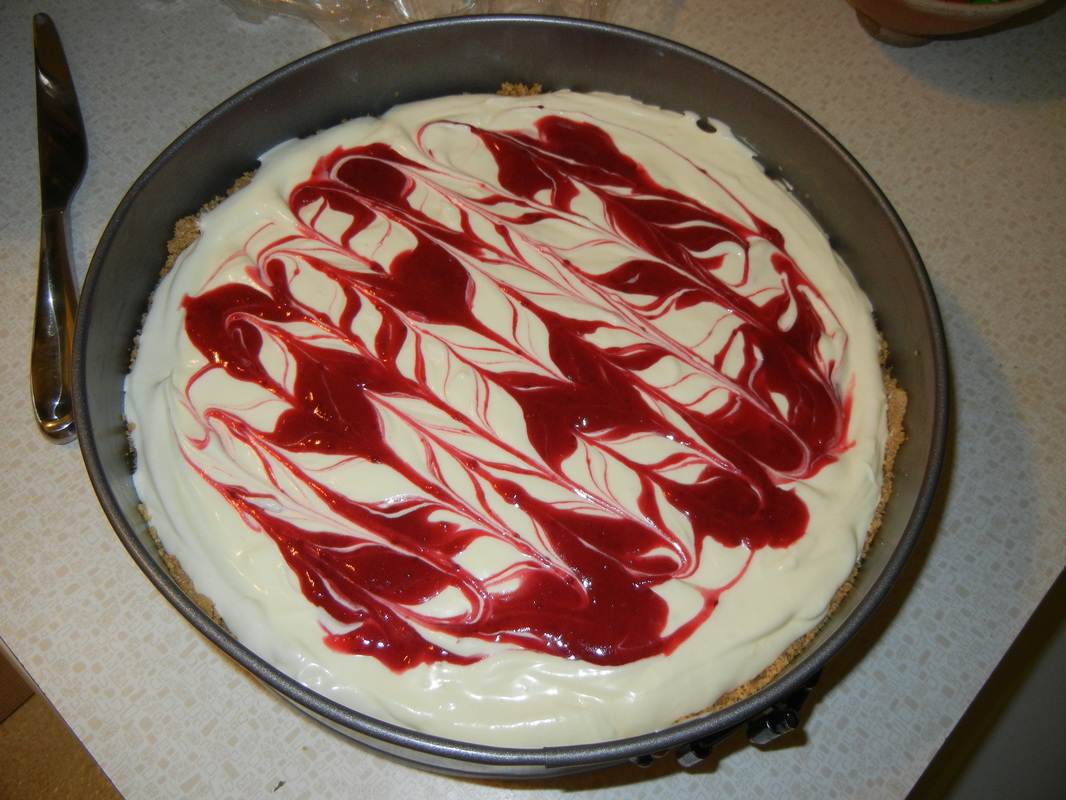
Take one-half cup of the cranberry sauce you made and place spoonfuls over the cheesecake batter and then swirl gently with a knife.
Top with the remaining cheesecake batter. Spoon another one-half cup of the cranberry filling over the cheesecake batter and swirl gently with a knife. (The extra cranberry sauce is saved to drizzle over the cake when serving). Depending on your pan, your cake make leak or drip, so either place it on a bed of foil or on a thin baking sheet and place in the oven.
Bake for 15 minutes and then lower the oven temperature to 250 degrees F and continue to bake for another 60 to 70 minutes or until firm and only the center of the cheesecake looks a little wet and wobbly. Remove from oven and carefully run a knife or spatula around the inside edge of pan to loosen the cheesecake (helps prevent the surface from cracking as it cools).
Let the cake cool before covering with plastic wrap and refrigerating. This cheesecake tastes best after being refrigerated at least eight hours or overnight. Now kick back, relax and bask in the benefits of your baking talents!
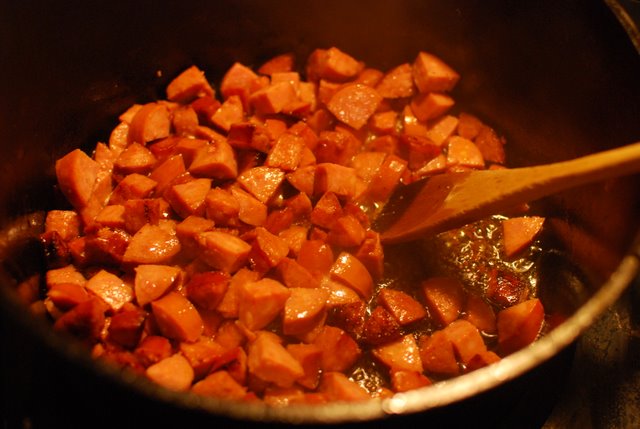
By Miranda I found a wild rice blend in the bulk section of my grocery store and decided to use it in a soup. I had some keilbasa in the freezer and this is what I came up with. I served it with homemade biscuits to add more calories- ha! Makes 4-6 servings.
You will need:
10-12 oz kielbasa (I used a blend of pork, beef and turkey- stores usually have a variety of kinds), chopped
3/4 cup chopped celery/about 2 large stalks with leaves included
3/4 cup chopped onion/about 1 medium onion
2 cloves garlic minced
6 cups chicken broth
3/4 cup chopped carrots/about 2 large
1 cup wild rice
1/2 tsp bells seasoning (comes in a yellow box with red and white writing on it - I use this in a variety of soups - it's worth buying!)
s+p to taste
To make:
In a stock pot over medium heat, brown the chopped kielbasa. Remove kielbasa (set aside for later), leaving oils in pan. (Depending on the fat content of your meat, you may want to discard some oil. I leave most of it in however, because this is where the flavor is).
Add onion, garlic and celery to the pot and stir occasionally until softened. Add the broth to the pot and bring to a boil. Add carrots and rice and simmer until rice is cooked through (usually about 40 minutes). Add kielbasa back to soup and add spices. Season to taste
with salt and pepper.
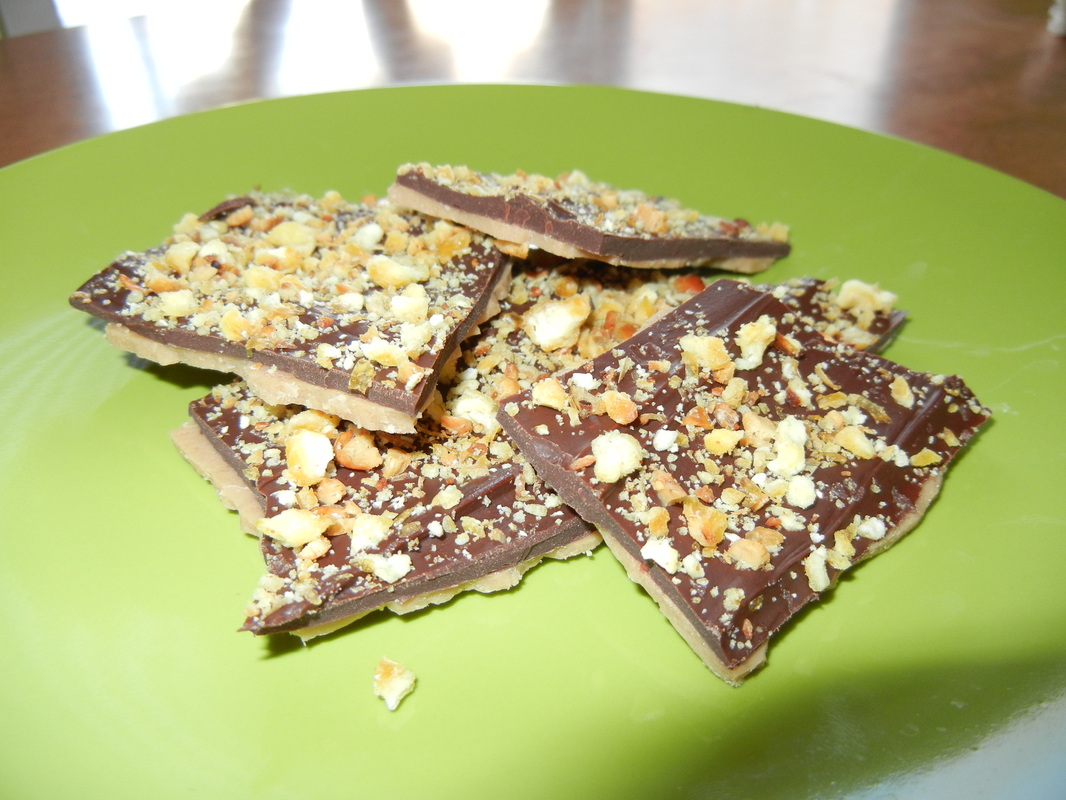
By Rachel This toffee is so delicious and such a great holiday treat. The recipe makes a TON of candy, so get ready to eat a lot and have plenty to share with family and friends! In the pictures it might not look like a lot, but that is because I cut the recipe in 3rds...and we still had a bowl full!
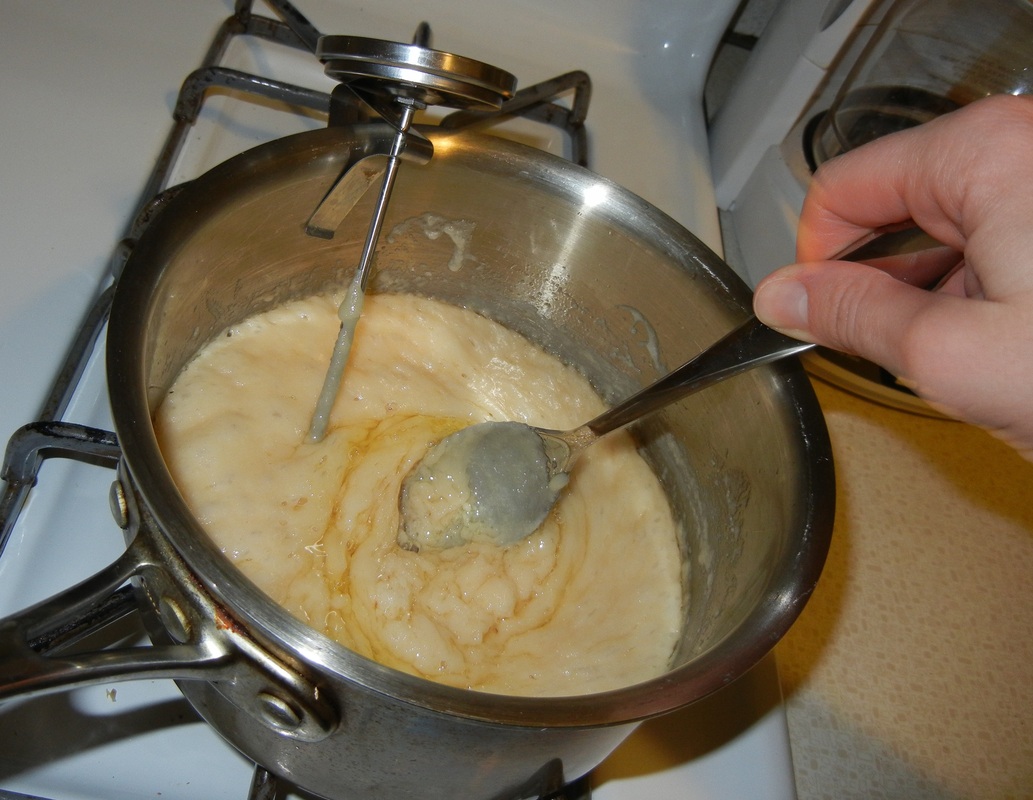
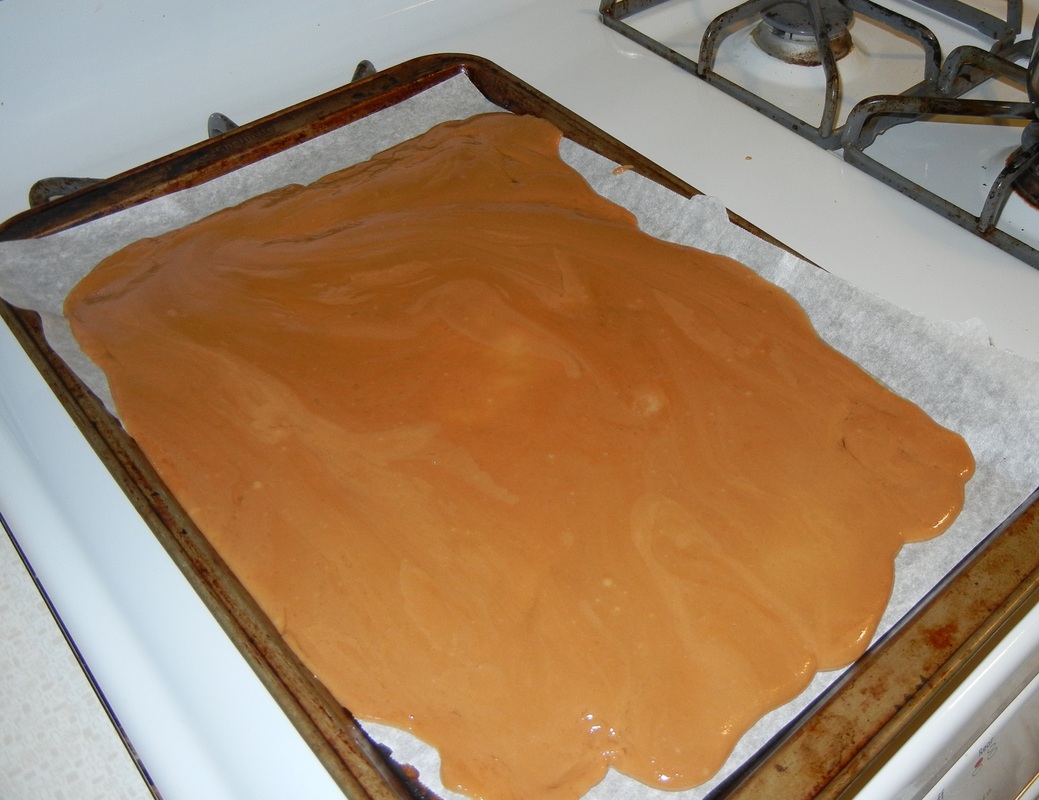
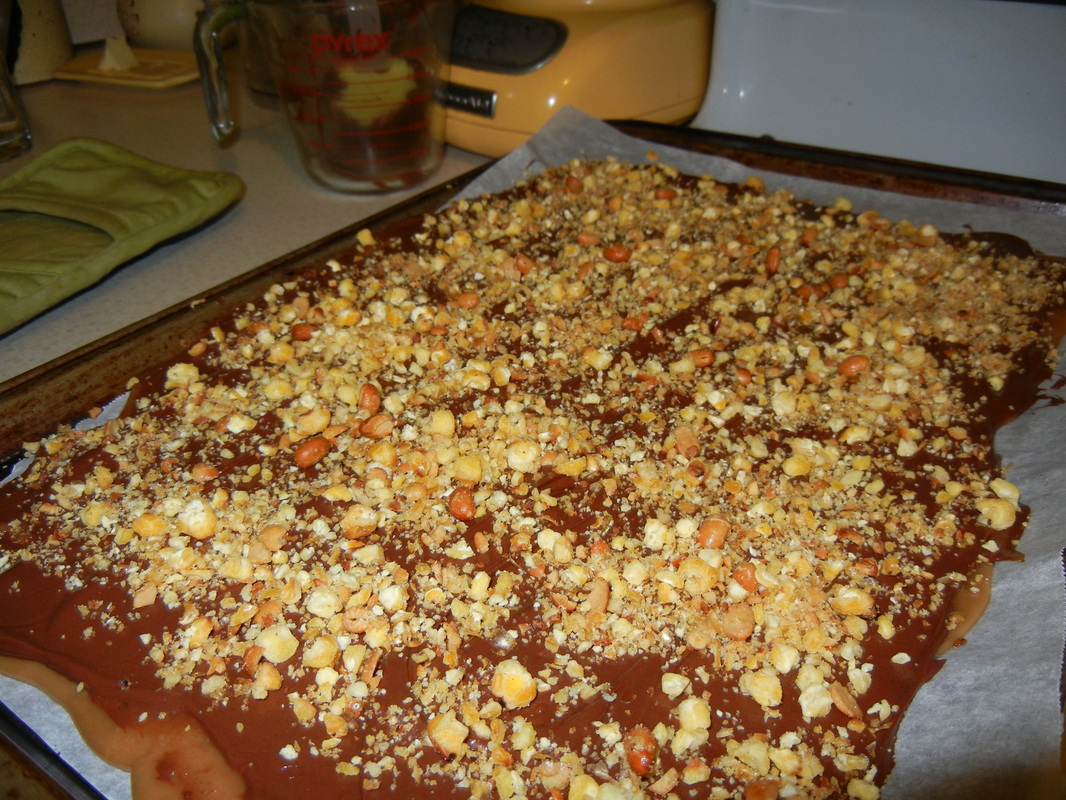
My Grandpa Po created a snack called Nutra Nuts, and even though has been gone a long time, I still get to remember him by eating and baking with them. If you don't have any of my Grandpa Po's Nutra Nuts you can get some here...or you can substitute them for crushed nuts like pecans or almonds. But I really think you should try them - they are super tasty. You will need: 1/4 pound crushed nuts OR one bag of Nutra Nuts3 cups (6 sticks) of salted butter 3 cups sugar 1 pound of chocolate (I just used chocolate chips, but you would probably be better off with higher quality chocolate! Directions: If you are using nuts, pre heat the oven to 350 degrees. Spread nuts evenly on a baking sheet and roast until they are fragrant, about 15 minutes. Remove nuts from oven and let cool completely. Transfer cooled nuts to a large resealable plastic bag. Using a mallet or other heavy object, pound nuts until coarsely ground. If you are using Nutra Nuts, simply grind them up a bit in a food processor or place them in a bag and pound them with a heavy object (like a soup can) or a mallet. Prepare a large, rimmed baking sheet with parchment paper. Melt butter in an 8-quart pot over medium-low heat; stir in sugar. Continue stirring until toffee reaches 305 degrees on a candy thermometer, this will take about 30 minutes and will really test your arm strength...my right arm is now super buff from all the stirring! Pour toffee onto the baking sheet, spreading evenly to cover. Let cool until toffee is slightly hardened, but still tacky. If you didn't use parchment, run a knife along the edges of the baking sheet to make toffee easier to remove.
Meanwhile, in a heat safe bowl set over simmering water, melt chocolate. I like to use a glass Pyrex measuring cup placed in a regular pot. Stir the chocolate constantly until all is melted and it's shiny - the minute it's stops being shiny it's burning!
Remove chocolate from heat and pour melted chocolate over toffee, spreading evenly to cover. Sprinkle the nuts or Nutra Nuts over the chocolate. Transfer to refrigerator until toffee is set, about 1 hour.
Break up the sheet of toffee into bite size pieces and enjoy!
Note: I store my toffee in the fridge so it doesn't get too sticky...the fridge keeps it nice and crisp!
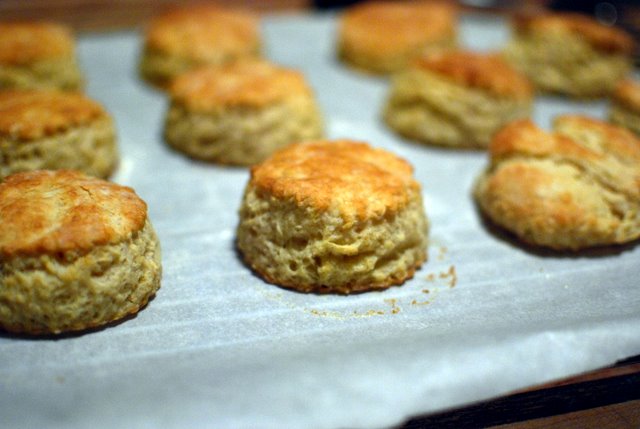
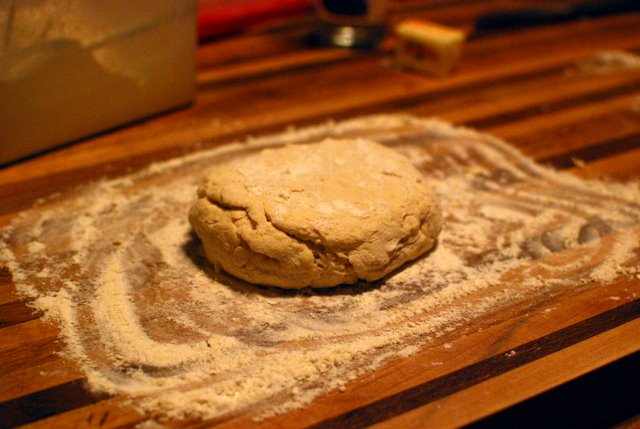
By Miranda These biscuits are really sooooo good. The trick is to NOT handle them a lot at all. The more you handle them, the tougher they get. So once the liquid is in, just do a few tosses of the batter, and a few folds of the dough, and then stop. I usually use plain yogurt cause I have it in my fridge more often than buttermilk, and actually prefer it. Either way, they are a great addition to breakfast, lunch or dinner!
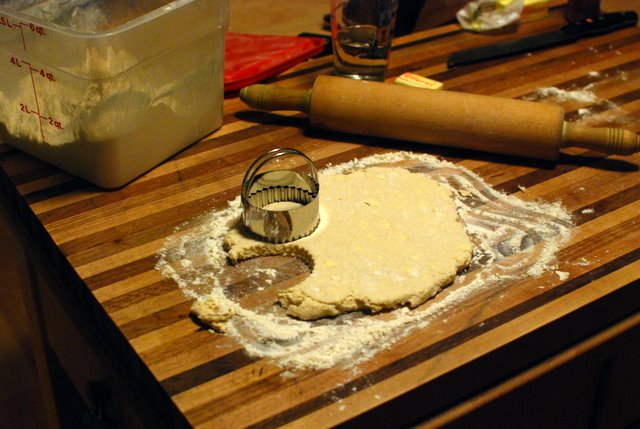
Makes about 10 biscuits, depending on your cutter size. If you don't have a biscuit or cookie cutter available, just cut into shapes with a knife. You will need: 1 1/2 cups flour 2 tsp baking powder 1/2 tsp baking soda Scant 1/2 tsp salt 1/2 tsp sugar 5 Tbs butter, cold 1/2 cup + 2 Tbs cold buttermilk or plain yogurt (if yogurt is very thick, add a little milk to thin it) Preheat oven to 450 degrees. Toss together all dry ingredients. Cut in the cold butter using a pastry cutter or 2 knives until butter pieces are as small as peas. Drizzle 1/2 cup buttermilk or yogurt over flour mixture and toss a few times- add remaining 2 Tbs if needed to soak up the extra flour. Lightly flour your hands and knead or fold-over the dough just enough times to get it to stick together. Handle it as little as possible. Once you have a ball or mass of dough, put it on a floured counter and roll it out to about 1/2 inch thick. Cut into shapes with a knife or with a cutter.
Place on a greased baking sheet or on parchment paper. Bake 10 minutes or until nicely browned on top. Yum!!
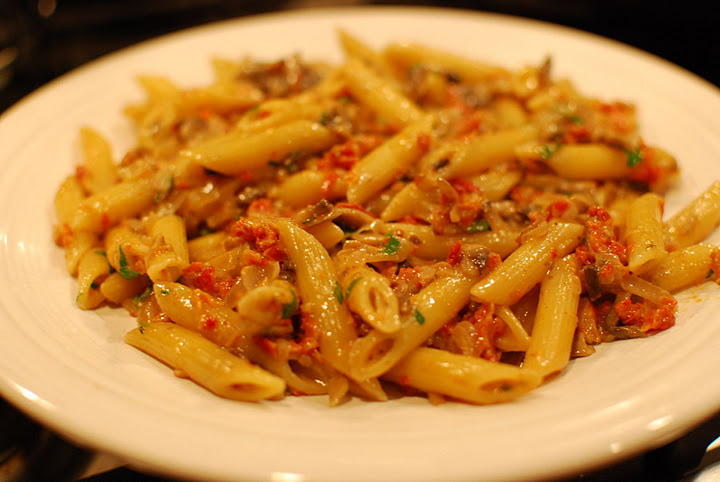
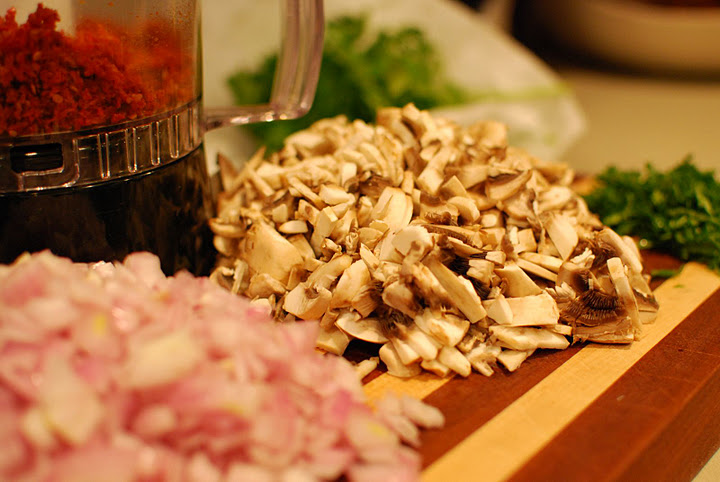
By Emily This recipe was originally from a pasta book that Miranda got for Christmas, and as soon as she opened it I copied down a few recipes and this is the one that has survived and become mine now : ) I've made it so many times, and naturally it's evolved a bit and definitely become one of my go-to pasta recipes. I've made it for many dinner parties too because it's versatile: you can add grilled chicken or beef to make it more of a meal, and you can cover it and keep it warm for a while beforehand, and it tastes great the next day. Use fresh ingredients though... once I made it with wine that I knew was borderline "turned" but figured I could still use for cooking, and sundried tomatoes that were a bit old (in the back of my fridge for about a year) and it definitely wasn't the same! Use fresh parsley too.... If you use good ingredients, it will be a great recipe for you too!
Serves 4
You'll Need:
4 Tbs butter
1 Tbs olive oil
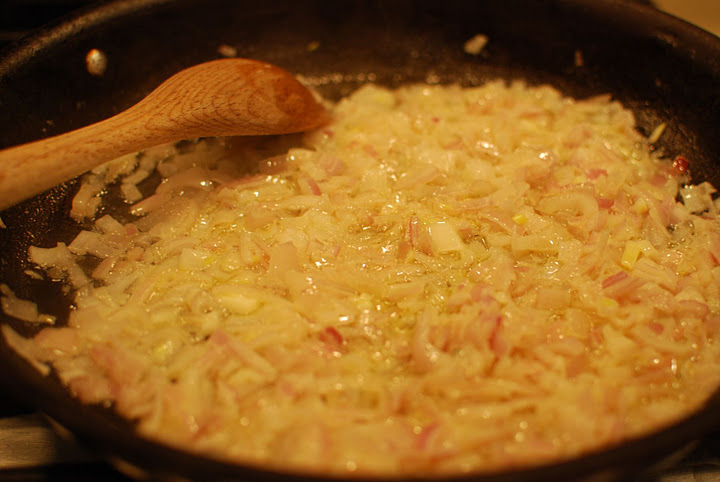
4-6 shallots, diced
1 pound baby portobello mushrooms, sliced small
Salt and pepper
A pinch of nutmeg
1 tsp flour
2/3 cup heavy cream
2 Tbs port wine, or use a good red wine
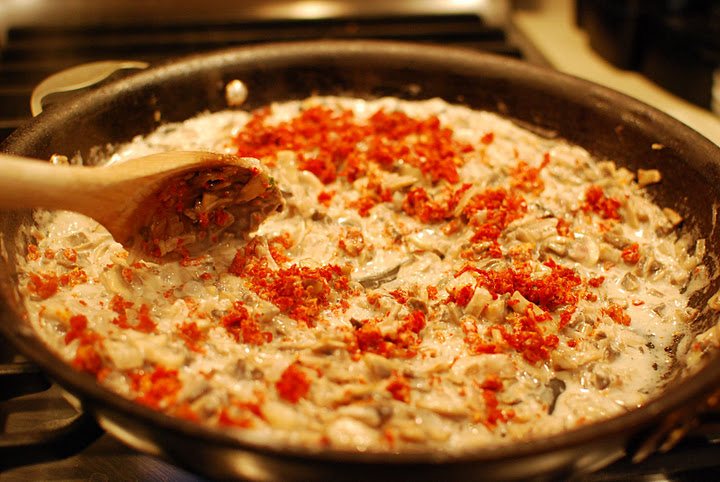
4 oz sun-dried tomatoes in oil, drained and minced in Cuisinart or blender
12 oz penne pasta
2 Tbs chopped fresh flat leaf parsley
To Make:
Start a pot of boiling water for pasta. Meanwhile, make the sauce:Melt butter with olive oil in a large skillet. Add shallots and cook 5 minutes over med/low heat. Add mushrooms, cook 4 minutes and season with S & P. Sprinkle with flour and cook another minute or two. Stir in cream and port slowly, stirring well. Add sun-dried tomatoes and nutmeg. Cook over low heat, stirring occasionally for 8 minutes.
Now the water should be boiling so you can cook the pasta in the boiling pot of water. Cook 8-10 minutes until al dente. Drain and add to mushroom sauce in your large skillet. Cook altogether for a couple minutes on low, then transfer to a warmed serving dish, sprinkle with chopped parsley and serve.
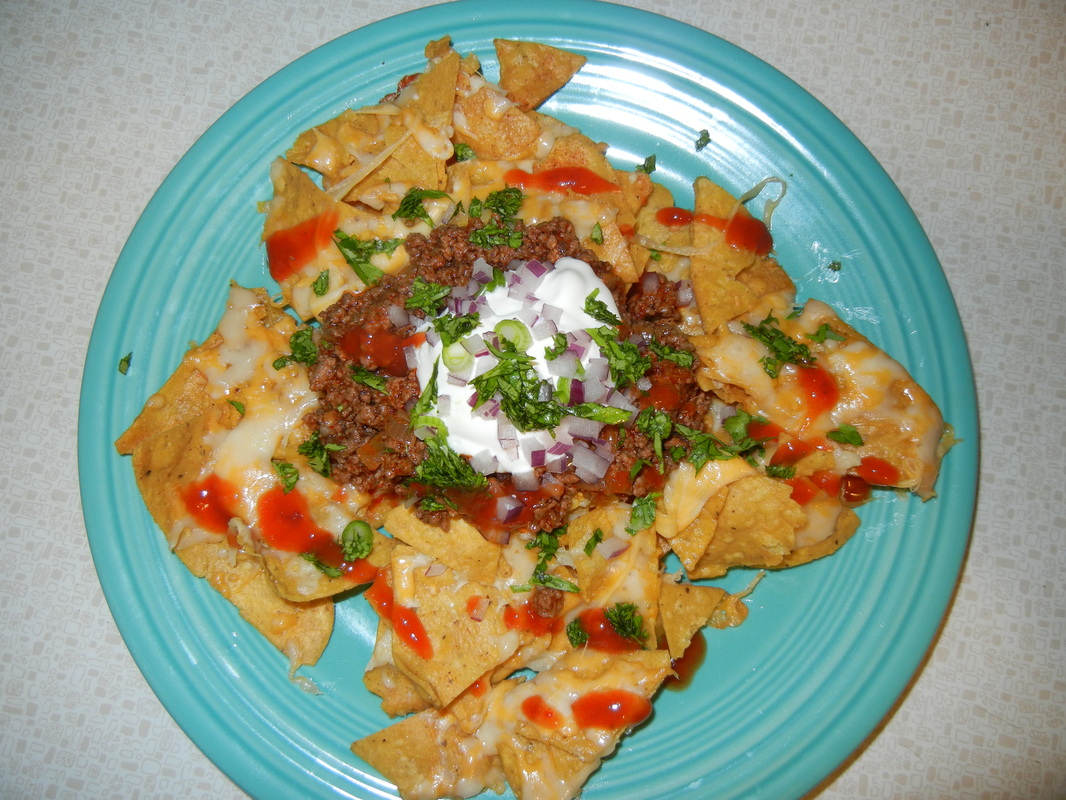
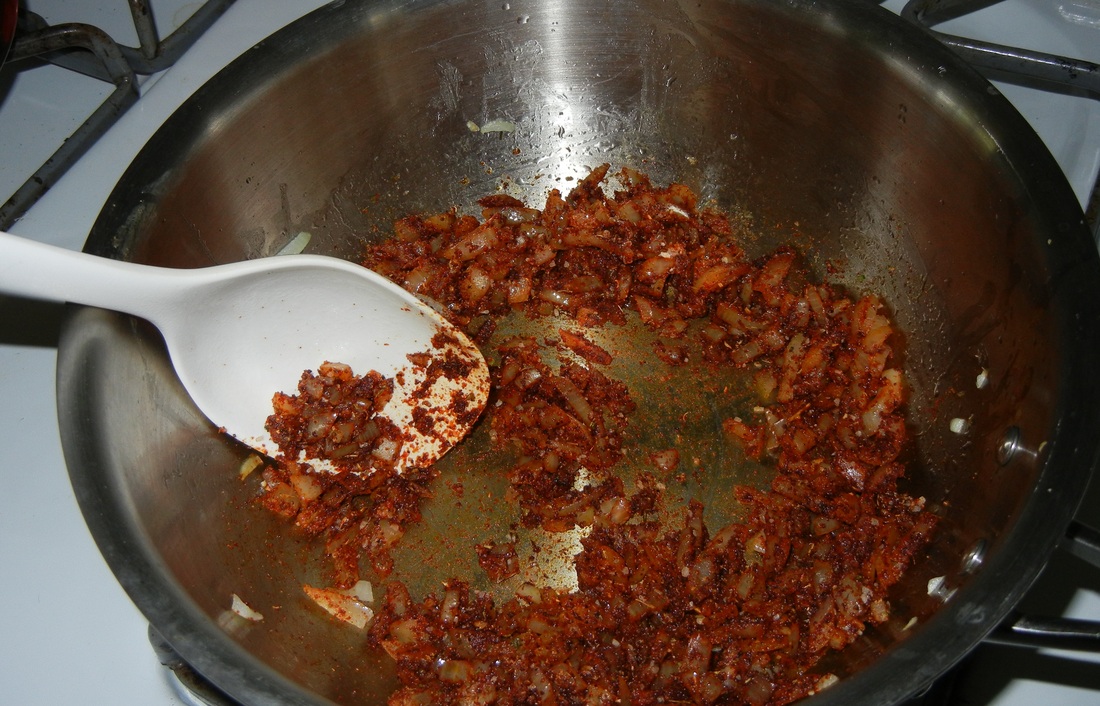
By Rachel I never knew there was anything better than taco meat seasoned with a Taco Bell or Old El Paso seasoning packet....until I met my friend Laura, and she introduced me to the best taco meat EVER! Now I don't think I will ever go back to plain old seasoning packets - unless I am in major pinch. This recipe makes allllllll the difference when making a plate of nachos. You will not regret the extra prep time! Here is what you will need for the taco meat:
2 teaspoons vegetable oil or corn oil
1 small onion , chopped small (about 2/3 cup)
3 medium cloves garlic , minced or pressed through garlic press (about 1 tablespoon)
2 tablespoons chili powder
1 teaspoon ground cumin
1 teaspoon ground coriander
1/ 2 teaspoon dried oregano
1/4 teaspoon cayenne pepper
Salt
1 pound 90% lean ground beef, or leaner
1 cup tomato sauce
1/ 2 cup low-sodium chicken broth
1 teaspoon brown sugar
2 teaspoons vinegar (preferably cider vinegar)
Ground black pepper
Optional other ingredients (if making nachos):
Tortilla chips
Cheese (good quality cheeses always taste better and produces less oil)
Pickled/preserved jalapenos
Sour cream
Onions (I used red and scallions)
Cilantro, chopped
Hot sauce
Directions:
Heat oil in medium skillet over medium heat until hot and shimmering but not smoking, about 2 minutes; add onion and cook, stirring occasionally, until softened, about 4 minutes.
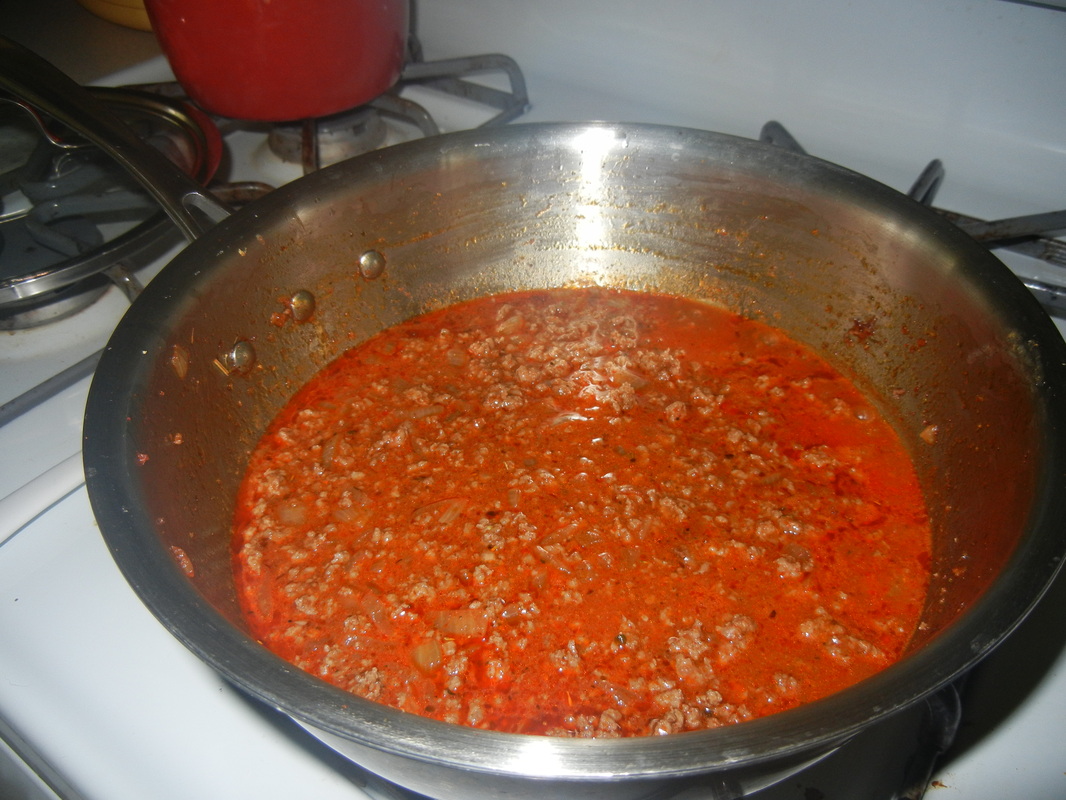
Add garlic, spices, and 1/2 teaspoon salt; cook, stirring constantly, until fragrant, about 1 minute. Add ground beef and cook, breaking meat up with wooden spoon and scraping pan bottom to prevent scorching, until beef is no longer pink, about 5 minutes.
Add tomato sauce, chicken broth, brown sugar, and vinegar; bring to simmer. Reduce heat to medium-low and simmer, uncovered, stirring frequently and breaking meat up so that no chunks remain, until liquid has reduced and thickened (mixture should not be completely dry), about 10 minutes. Adjust seasonings with salt and pepper.
After your taco meat is done cooking, let it sit while you prepare the rest of your nachos (or tacos, burritos, etc). This time I made nachos, so I layered my favorite tortilla chips (Ann Arbor Tortilla Company chips are the BEST!) on a baking dish, shredded good quality sharp cheddar and Monterey jack cheese on top and cooked them until the cheese was melted (just a few minutes so you don't burn the chips). Then I topped them with taco meat, jalapenos, sour cream, onions, cilantro, and hot sauce.
Enjoy!
Note: Using lean, higher percentage beef is important because you don't drain the meat after cooking it, which means all the fat that comes out from cooking goes in your mouth...I mean, this TASTES good, but is pretty nasty and unhealthy!
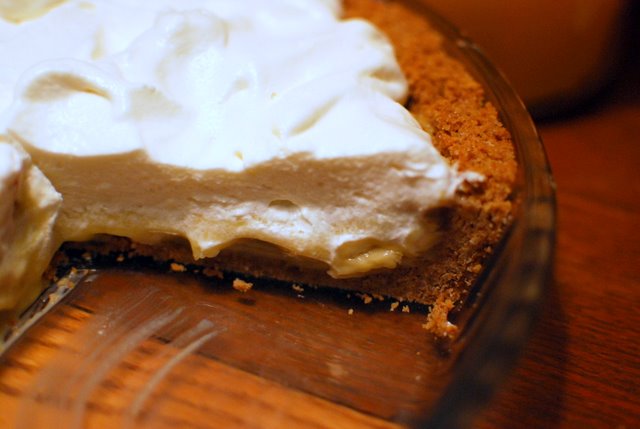
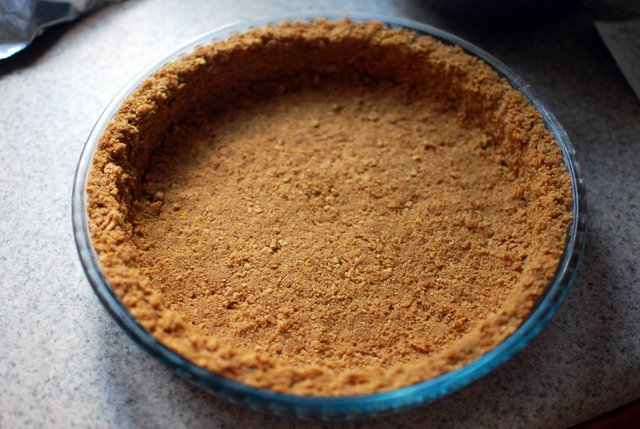
By Miranda I saw an ad for banana cream pie and then I craved it for 2 days after that...so I had to get rid of the craving. I decided to make it with a graham cracker crust rather than the typical pie crust (but the filling would work with a regular baked pie crust as well). This turned out great and my husband who normally doesn't care for bananas liked it!
This recipe has been adapted from Small Batch-Baking by Debby Maugans Nakos
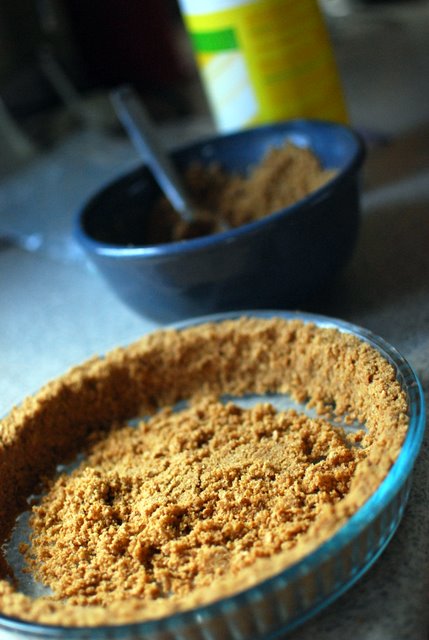
Graham Cracker Crust:
1 and 1/3 cups graham cracker crumbs (approx 10 whole crackers)
6 Tbs butter, melted
1/4 cup sugar
Filling:
1/2 cup sugar
1/4 cup flour
pinch of salt
4 large egg yolks
1 1/2 cup milk
2 Tbs banana flavored liqueur (optional)
2 tsp vanilla
2 - 2 1/2 bananas
Whipped Cream:
1 cup whipping cream or heavy cream
1/4 cup confectioners sugar
1 tsp vanilla
Mix crust ingredients together and press into sides and bottom of standard size pie dish.
Bake at 325F for about 10 minutes or until slightly browned. Allow to cool while making filling.
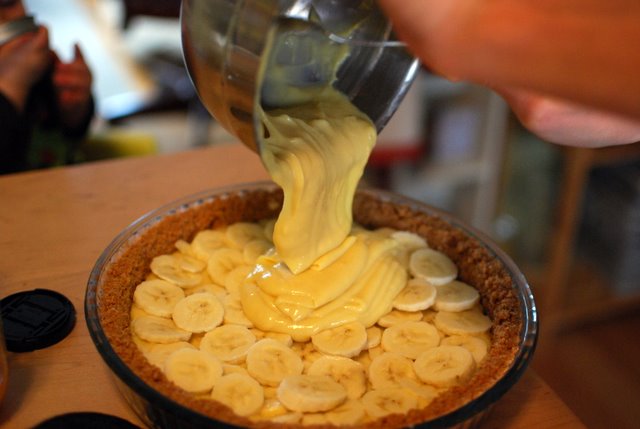
Place sugar, flour, salt in a small saucepan and whisk to blend. Add egg yolks and milk and whisk until smooth. Cook over medium heat, whisking constantly until the custard thickens and just begins to boil, about 5-10 minutes. Remove from heat and whisk in liqueur (if using) and vanilla. Let mixture cool to lukewarm, whisking it occasionally.
Cut banana into thin slivers. Line bottom of pie crust with half of bananas. Spread half of custard mixture over bananas. Continue layering the rest of bananas over the custard and then top with 2nd half of custard mixture.
Cover pie and refrigerate about 2 hrs or until chilled. When ready to serve, whip cream in mixer with confectioners sugar and vanilla on high speed until thickens and peaks form.
Top pie with whipped cream and serve!
Note: Cream whips a lot quicker if mixer bowl and whisk attachment are placed in freezer
to chill prior to whipping.
|